Class Scheduler
This Android application allows a trainer to keep track of
batches and classes. Once trainer enters details about batches that are
to be started, the application displays the ending date and the entire schedule of
classes. It is also possible to add, delete and cancel classes.
The following are the major operations in this application.
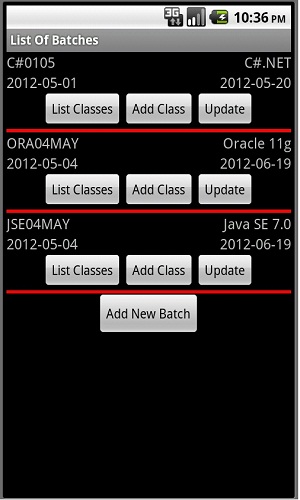
- List of Batches
- Adding new batch
- Updating an existing batch
- Deleting an existing batch
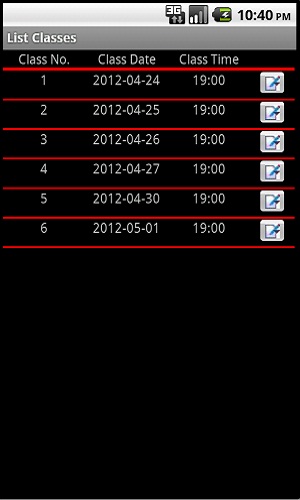
- List of classes
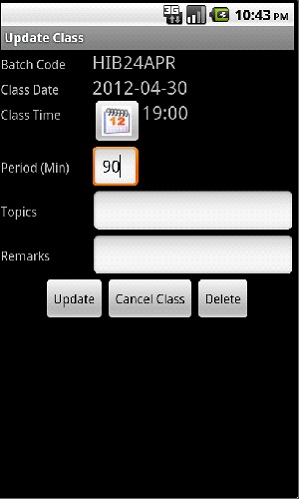
- Adding a new class without or without changing last date
- Cancel a class and add a new class after the last class
- Update an existing class
- Deleting an existing class
Screen Shots
Here are some screen shots related to this application.
Install Application In Android Device
If you want to install this application into your device, download ClassScheduler.apk file into your device and install it when prompted to do so.
For this to work in your device, you must go to Settings -> Applications and turn on
Unknow Sources option.
Steps to download, open and run this project
The following are the steps to be taken to run the existing part of the application.
- Download ClassScheduler.rar and unzip it into any directory in your system.
For example, if you extract to c:\ then it will create a directory c:\classscheduler.
- Start Eclipse IDE and import this project into Eclipse Workspace as follows :
- Select File->Import
- Select General node and Existing Projects into Workspace
- Click on Next
- Select root directory radio button and select folder into which you extracted .rar file (c:\classscheduler). It displays the name of the project (ClasssScheduler) in Projects listbox.
- Click Finish button. Project is imported into current workspace.
- When you run project first time database is automatically created and tables are created.
- Click on Add Batch button and add a couple of batches
- Use List Classes button and check the scheduler for the selected batch